Tuesday, July 31, 2012

Antique Paper

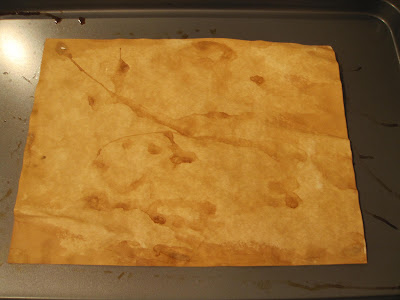
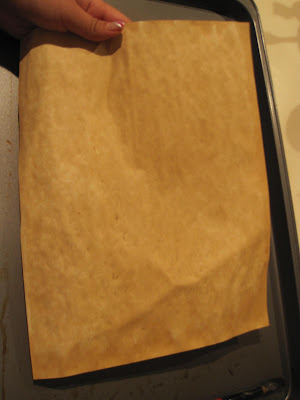
This is how to "age" paper. There was a lot online where they used tea, coffee, ovens, and a lot of other things. But for me, I didn't really want to use the oven in the summer. Especially in where I live where it gets crazy hot in the summer. My mom really hates it when I use the oven in the summer as well as my siblings. So I had to think of a way to "age" my paper without my oven. I found a way and I haven't seen it anywhere else online, but I'm sure this isn't the first time a person used this method.

Materials:

  • Paper
  • Disposable cup
  • 1 tbsp ground coffee
  • 1/4 cup water
  • Old paintbrush
  • Hair dryer 
  • Cookie tray

Directions:

  • Place your paper on your tray. Get a disposable cup and add in your water and coffee. Mix well.
  • Paint your paper with your coffee mixture. Then dab the excess coffee with a folded piece of toilet paper.
 (First attempt: Just painted without any thought and didn't dab with toilet paper.)
(Second attempt: Used a little at a time and went straight across and dabbed with toilet paper.)
  • Dry your paper with your hair dryer on high.
(First attempt: Liquid kinda just flew everywhere. In conclusion, there where trace marks.)
(Second attempt: No streak marks and smooth.)
  • Optional: You can add a second coat if the first time wasn't enough.
(Second attempt: It was too light so I redid it. First attempt was already dark enough.)

-Ellenia

Saturday, July 28, 2012

Love Letter in a Bottle

This is using one of the smaller bottle from the Tim Holtz idea-ology corked vials. I really love these bottles and you can buy them at Michael's at the stamp and ink sections. I also have a couple variations to this DIY. These are for my little, teenage sisters and I thought it would be really cute to give to their boyfriends. (BTW, that's my little plant on my window. It just looked really nice to take pictures with the plant so that's basically why all my bottles are on a plant in case you were wondering ^^)

(This one is mine)
(This one is for my sister)
(This is for one of my younger sisters)
(This is for my youngest sister)

Materials:

  • Small corked vial
  • Pink beads
  • Red beads
  • Jump ring
  • Light pink paper
  • Pink extra-fine glitter or just regular glitter
  • Hot pink stars
  • Hot pink extra small beads

Directions for the Message:

  • Cut out a 4.5x2cm rectangle from your piece of paper. Write out whatever you want with a pen. 
  • Roll it up and slip a jump ring through your rolled piece of paper.
  • Now you can make a bunch of different variations. Here's how to make the ones I made for myself and my sisters.

Directions for Hot Pink Stars:

  • Add in small stars, beads, and your message.

Directions for Pink Glitter and Pearls:

  • Add in a small amount of pink glitter, small pearl beads, and your message.

Directions for Pink Beads:

  • Add in 3 pink beads and your message.

Directions for Pink and Red Beads:

  • Add in 4 pink beads, 4 red beads, and your message.

-Ellenia

Monday, July 23, 2012

Wish Bottle

This is my first DIY post for this blog, so I started with something simple. I saw this picture online and I really wanted to remake it myself. So I went to Michael's and bought some supplies. I bought some silver star confetti, a jar with a hinged lid, and some E600 glue. I accidentally ripped the silver star confetti bag so I don't have the label but it is still new.

This was inspired by this picture that was found on this blog. http://iamjolene.blogspot.com/2010_04_01_archive.html

Material:

  • Silver star confetti
  • Jar with a hinged lid
  • E600 glue
  • White paper
  • Black fine tip Sharpie pen
  • Scissors

Directions:

  • Pour your bag of star confetti into your jar and save about 5 confetti stars.
  • On your piece of paper write out Wish or Wishes on it and choose the one you want. Or you can print out your words with fancy fonts.
  • Cut out your word and glue it on the center of the jar or wherever you want it. Then use more glue and glue on your 5 stars you set aside. Tie a silver, elastic string around the top.

-Ellenia

Friday, July 20, 2012

Hi There!

Hi there! My name is Ellenia and I will be starting a crafting blog according to what I do during my summer vacation! I'm still a student learning culinary arts as you can see in my first blog, The Sugar Bubble. Starting on Monday I will be putting up DIY crafts consecutively everyday. Most of these projects are from pictures I've seen on the internet and I'm just trying to recreate them from my own perspective. If the projects are from the internet, don't worry, I'll post up the original picture as well as my own and give the credits to the original creator! I hope you enjoy my posts and check out my other blog as well!

-Ellenia